I think all teachers would agree that students needs hands-on science activities to really understand the science concepts and make connections.
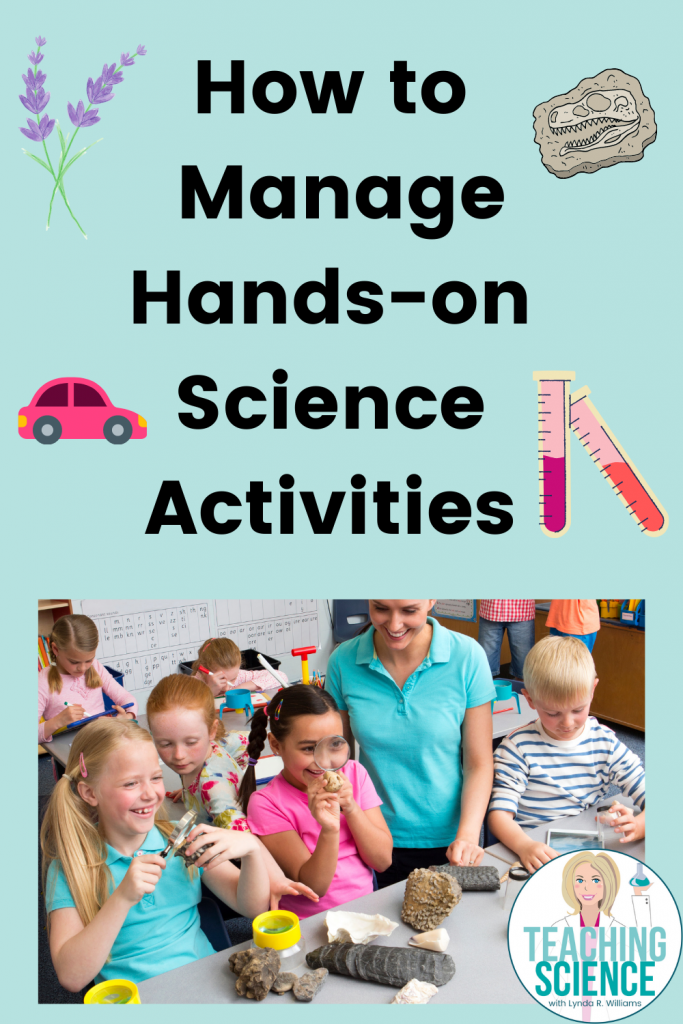
How do you set up hands-on science activities in a way that they are manageable?
First of all we need to think about materials. How many sets of materials do you have? Is it enough for each student to have their own supplies? this might be true if the supplies for the activity is something easy to have a lot of…such as paper and tape, or toothpicks and mini marshmallows. In this case hands-on science activities can be each student working by themselves with a set of materials.
However, most of the time, teachers will have limited supplies and it will make more sense to have a set of supplies for several groups. If I have 30 students in a classroom, I can make six groups of five and have a set of materials for each group. It will be much easier to manage 6 sets of supplies than 30! Let’s say I need each group to have a toy car and a ramp. This will be much easier in small groups.
Cost of Materials for Hands-on Science Activities
The second thing we need to consider in hands-on science is the cost of the materials. Sometimes there is no way around it, you will have to come up with some money to pay for copper tape, coin batteries and LED lights.
Other times you can simplify and make it more cost efficient by using household items instead of traditional science equipment. I love using empty jars instead of beakers for science activities. I have eaten plenty of pickles, hearts of palm and salsa just so I would have the perfect size jar to use for my hands-on science activities.
Likewise, you can use paper plates, recycled materials, foil and caps from bottles for many of your hands-on activities. Think outside the box and think also about the box itself! A thrifty teacher can find many uses for cardboard, straws, twist ties and rubber bands in their science and STEM activities.

Setting Up and Prep for Hands-on Science
You will need to plan in advance for the materials you need. If I have six groups I should set my materials up on the counter in six sets. This will make distribution easier. Small items should be put in baggies. If I want each group to have 20 toothpicks, a baggie of 20 toothpicks along with the other materials should be ready to go at the beginning of the day.
Giving Directions
It is best to hands out materials only as the students need them. I also like to give clear directions before I hand the materials to each group. For example, in my lesson with kool-aid chemical reaction, I would first give each group the water in a cup and the kool-aid packet. Then I would instruct them to mix the contents of the kool-aid packet with the water. I would also direct them to leave it on the tray. Next, I would have students write a prediction before I hand them the baking soda. This keeps students from just impulsively dumping everything together before they even made a prediction. I have also premeasured the baking soda and placed a heaping teaspoon in each paper cup before class. In this way, I can just hand them the cup of the “mystery powder” without them even seeing the baking soda box.

Set Clear Expectations
I let my students know that working with hands-on materials is a privilege. I let them know they must handle the materials properly. While I am not really interested in excluding students from the learning, I have asked student to scoop their chair away from the table for one minute. If I have a child grab materials out of someone’s hand or pretend they are going to drink the unknown substance, I will say, “scoop your chair back for one minute.” The student will move their chair back and watch as the hands-on science continues. I usually set a timer on my phone so I do not forget. Then I say, “Are you ready to follow the directions and use the materials properly?” If the student says yes, I allow them to rejoin the group. I do not give any additional consequences. I make participating in the fun activity the intrinsic reward. This system works extremely well. The students do not want to miss out on the fun activity so they follow directions. Also, if I do have to move a student back, it is just for one minute. They do not miss out on the learning. They are not sent out of the room.
With these tips on teaching science, your students can enjoy hands-on experiences in science and you can still have excellent management. You might also like my blog post on how to plan for the very first day of school.
Check out my TPT Store
FREE Carrying Capacity Game